Gist is one of the coolest features of GitHub, which allows you to store and share code snippets with others without having to create a fully-fledged repository on GitHub. It doesn’t necessarily need to be just code snippets, it can be anything like a string of code, a bash script, markdown, text file, or some other small piece of data. It can be used for quickly sharing a piece of code with others for anything like a demonstration, guide, or any solution without creating a conventional repo. You can also use it to embed it on your site or elsewhere.
However a gist also supports many features of repository like you can fork it, clone it or even you can view workflow on a single gist just like repository.
What is GitHub gist used for
There are many things you can do with GitHub’s gists, not big tasks but maybe some task to boost your productivity. :
- Share code snippets with other without a fully fledged repository
- Embed your code snippets in your blog or website
- Publish gists in rich text
- Gist as writing platform
- Host single page website on gist
- Maintain a task list
- Gist as a web clipper
If you want to learn how to do any of these, then you can visit here
Also read- How to toonify yourself -with codes
How to make GitHub gist
Creating gist is not a big task, it’s very easy. Below are the steps you can follow to create your own.
- Go to GitHub website or you can also visit GitHub’ gist website
- Then login to your account or if you don’t have any then you need to create it
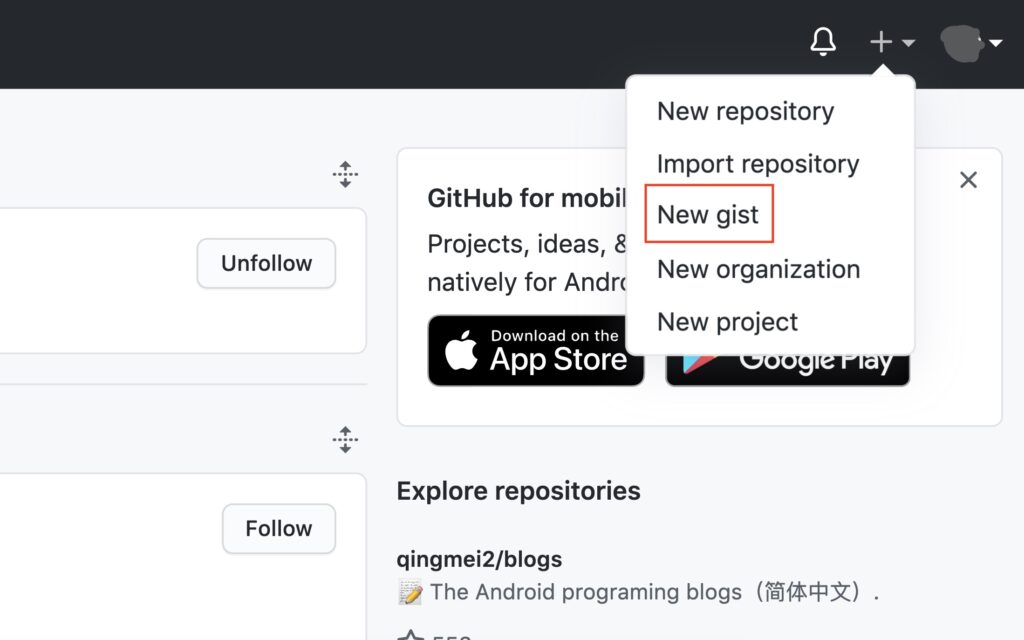
- After that you can navigate to Create menu(plus icon)> new gist. You will find create menu on the left side of your profile icon. If you are already on the GitHub gist website you can simply click on create menu.
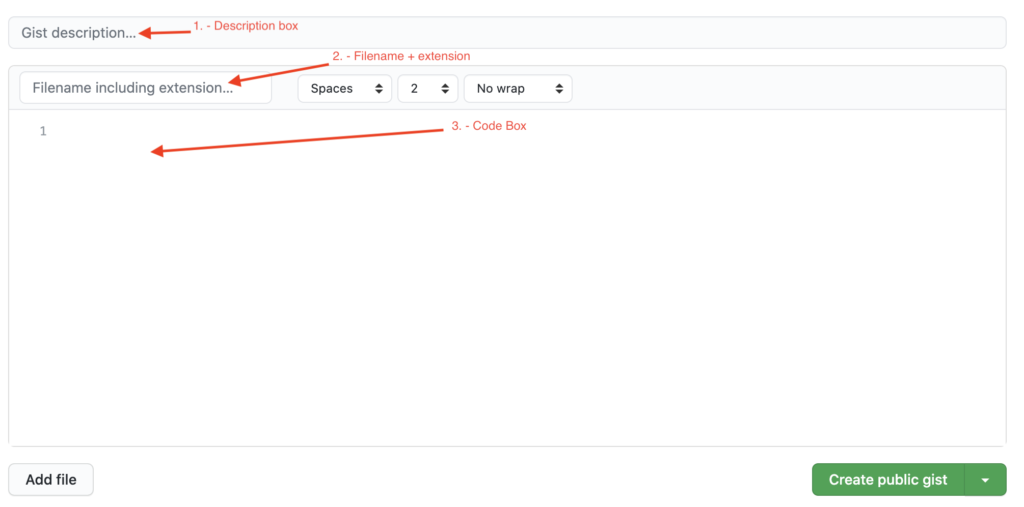
- Now, you will see a page like this Here you can fill the description (about your gist, not necessary) and name of your file. Your file name should contain the file extension(file type) based on your gist for example if you are creating any python sample gist then you can add .py at the end of you file like “hello.py”.
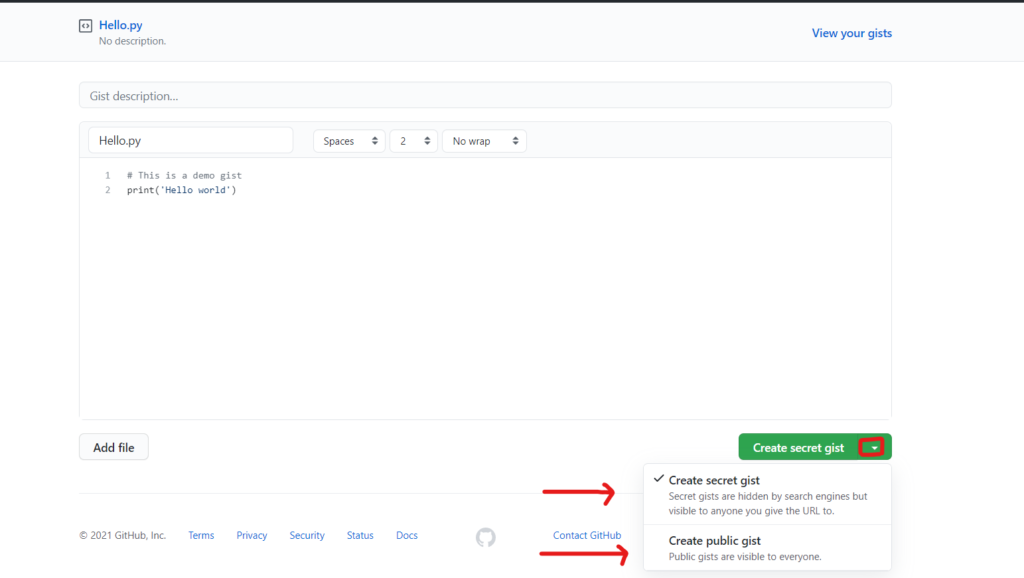
- After writing your code you can make it either public or private. If you make it private, no one will be able to see it except the person with your gist url (with whom you share).
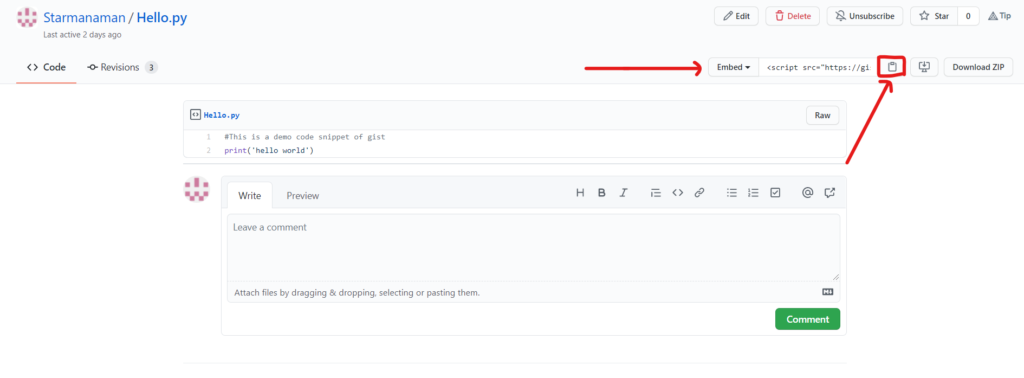
- That’s it, it’s ready now you can share it with anyone you like. So for the demo purpose, I have created it public and you can see how it looks when you embed it in your website
If you also want to embed it you can copy the embed code of your gist
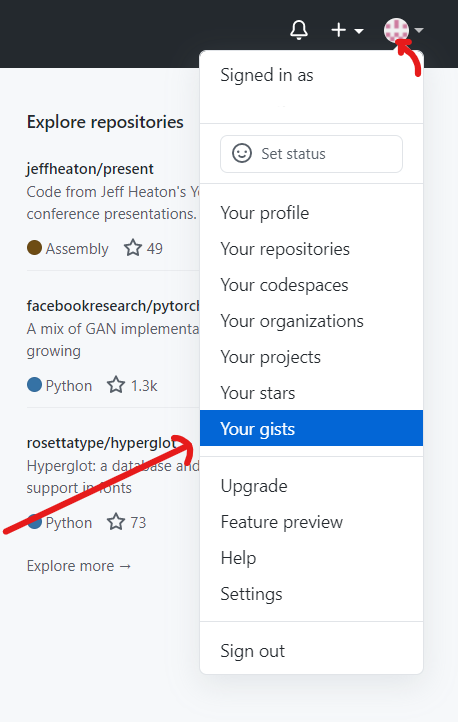
If you want to see your all gist, you can see it by just navigating to your profile>your gists in both GitHub’s and gits website
GitHub vs gist: what are the difference
Well, This is not intuitive to compare them but even if you try, it is like comparing notepad with Microsoft word, you can only do selective things with gist in comparison to GitHub. You can share just code snippets with gists but with GitHub you can share the entire project as repo. Also with GitHub you can collaborate with others which you can’t with gists.
To conclude, I would say you can use gist if you want to share something like implementation of a small feature or some kind of tips or want to help someone etc. And you can use GitHub if you are working on a big project like if you are building any website, mobile or web application or working on your assignment with your teammates. If you want to learn more about it you can visit here

Data Scientist with 3+ years of experience in building data-intensive applications in diverse industries. Proficient in predictive modeling, computer vision, natural language processing, data visualization etc. Aside from being a data scientist, I am also a blogger and photographer.
- Aman Kumarhttps://buggyprogrammer.com/author/buggy5454/
- Aman Kumarhttps://buggyprogrammer.com/author/buggy5454/
- Aman Kumarhttps://buggyprogrammer.com/author/buggy5454/
- Aman Kumarhttps://buggyprogrammer.com/author/buggy5454/

