Reading books in Audio format now becomes a trend, it’s productive, entertaining, and time-saving. You may have seen many companies selling these audiobooks and you might be using one. But do you know you can create an audiobook using python by yourself using python or you create a voiceover for any video or script? It won’t be good as them as they hire voice artists for that but yeah it’s good to some extent and most important thing is that it’s fun, informative, and entertaining. So, let’s start =).
I will show you two ways of creating an audiobook using python. First one is using pyttsx3, which works offline which means you will not need any internet for that and another way is using gTTS which is a Python library and CLI tool to interface with Google Translate text-to-speech API., and both have their own pros and cons. And don’t worry about the codes, you can download my notebook and other used resources in this article from here.
Before you start Few things are recommend for better experience (not mandatory)
- Read this article on the desktop if possible, cuz in few places I have used some screenshots of my code snippet to show their output and which may not appear properly on the phone
- Use Table of Content to navigate to desired points of the article if you want, cuz this article is quite long, thanks to the source code I posted here
- If possible use the notebook (whose link I gave you above) on jupyter notebook, cuz in colab audio created on pyttsx3 doesn’t work without saving. You can use it if you want but you need to save the audio, which I will show you below. Note the issue on colab is only for the library using pytts3 whose audio is not saved and everything else is fine
The first way is using the pyttsx3 python library we will first learn how to use it and then we will see how to create a basic audiobook using any pdf or text document. Or if you want you can directly jump over to a pdf to audio conversion section.
What is pyttsx3?
The pyttsx3 python library, which stands for python text to speech, and maybe “x3” stands for some version name or something, IDK. This library reads your text and transforms it into an audio form, internally in the backend it uses your available system voice, in the window you may know Microsoft has two preinstalled voices “Microsoft David” and “Microsoft Zira”. You can use any one of them in the text to audio conversion
Also, read –> How to do Twitter sentiment analysis, learn by doing Elon musk’s tweet analysis
How to use pyttsx3?
Using pyttsx3 is not a complex task, it very easy to use and despite of converting text to audio it gives you a lot more control over voice of transformed audio. We can change voice, adjust speech rate, adjust volume, etc. So let’s see how we can do all this below
As usual first we need to import all required library, we will need
pyttsx3 –> we will use this for text to audio conversion
IPython –> if you are working on jupyter/colab notebook
os –> if you are working on pycharm/vscode script ide
# !pip install pyttsx3 # --> run this if not installed

# import library
import pyttsx3
import IPython.display as ipd
import os

# intializing pyttsx3
engine = pyttsx3.init()
Now to convert any text to audio we can simply use “say” function with our text. and after that we will use “runAndWait” function which will covert and play it
text = 'Hello world'
engine.say(text) # ------------> you can directly enter your text here if you want
engine.runAndWait()
How to change voice in pyttsx3
Now we will see how we can change it’s voice, it uses voices available in your system. for example if you are on window then it may have
- Microsoft David Desktop – English (United States)
- Microsoft Zira Desktop – English (United States)

We can change it’s voice by using setProperty function
voice_id = voices[1].id # ----> we are using second voice
engine.setProperty('voice', voice_id) # ----> this is how you can change pyttsx3 default voice

# now let's see if it worked
text = 'Welcome to Buggy Programmer!'
engine.say(text)
engine.runAndWait()
It worked and I guess her voice is better than David’s (default voice) right?.
so we will not change it back to its default voice
Also read –> How to restore your old damaged image (like scratches, food stains, etc) using python
Now let’s see how we can adjust it’s speech rate,
speech rate is number of word spoken per minute, by default it is set to 200.

changing default voice
engine.setProperty('rate', 300) # ---> we set the speech rate to 300

# let's see if it worked
text = 'Buggy Programmer is a great place for programmers'
engine.say(text)
engine.runAndWait()
Man she is fast XD, lets put her back to it’s default speech rate
# we will change it back to it's default speech rate
engine.setProperty('rate', 200)
Okay so now let’s see how we can adjust it’s volume
The volume range is 0 to 1 and by default it is set to 1

engine.setProperty('volume', 0.5) # ---> we reduce the volume to 0.5 from 1

# let's see if it worked
text = 'Let me tell you a secret. You, are, a, programmer'
engine.say(text)
engine.runAndWait()
# we will change it back to it's default speech volume
engine.setProperty('volume', 1)
We can also convert multiple text at once in pyttsx3
# we can easily convert multiple text to speech, just by using say function multiple times
engine.say('Hello World')
engine.say('Welcome to Buggy Programmer')
engine.say('You are doing text to speech conversion')
engine.runAndWait()
Now we will see, how we can save this pyttsx3 audio file
# we can save our audio file by using "save_to_file" function
text = ("Wish you a Bug free day")
engine.save_to_file(text, 'wish.mp3') # ---> this is how we can save our converted audio file
engine.runAndWait()
Let’s see how we can play saved audio file
# if you are using any notebook like jupyter, colab then you can use both shown method

# 1st method (recommended for notebooks)
import IPython.display as ipd
ipd.Audio('wish.mp3') # ---> give your file address if it not works
#-----------x------------------------x---------------------------x-----------

# 2nd method
# # if you are on using any script-based ide like pycharm, vscode then use this
# import os
# os.system('wish.mp3') # ---> give your file address if it not works
Create an audiobook using python from PDF or text file?
Okay, we saw all controls of pyttsx3, now we will see how we can create an audiobook from pdf or txt file with this. For that, we will require one more library to be imported i.e, “PyPDF2” which is a python library for reading pdf files
#!pip install PyPDF2
import PyPDF2
Let’s first convert a txt file to audio file
# for demonstration purpose I just copied 2 Paragraph from Elon's Wikipedia page
Elon = """Elon Reeve Musk is an entrepreneur and business magnate. He is the founder, CEO, and chief engineer at SpaceX; early stage investor,[note 1] CEO, and product architect of Tesla, Inc.; founder of The Boring Company; and co-founder of Neuralink and OpenAI. A centibillionaire, Musk is one of the richest people in the world.

Musk was born to a Canadian mother and South African father and raised in Pretoria, South Africa. He briefly attended the University of Pretoria before moving to Canada aged 17 to attend Queen's University. He transferred to the University of Pennsylvania two years later, where he received bachelor's degrees in economics and physics. He moved to California in 1995 to attend Stanford University but decided instead to pursue a business career, co-founding the web software company Zip2 with his brother Kimbal. The startup was acquired by Compaq for $307 million in 1999. Musk co-founded the online bank X.com that same year, which merged with Confinity in 2000 to form PayPal. The company was bought by eBay in 2002 for $1.5 billion."""
# storing those text in new txt file
file = open('sample.txt', 'w')
file.write(Elon)
file.close()
Now let’s read it and convert it into a audiofile
# now we will read that txt file and convert it into audio file
with open('sample.txt') as f:  # --------> if not work then give full address of the file
    lines = f.readlines()
engine.save_to_file(lines, 'Elon_from_txt.mp3')
engine.runAndWait()
f.close()
# let's play it
ipd.Audio('Elon_from_txt.mp3')
Okay so now let’s convert a pdf file to audio file
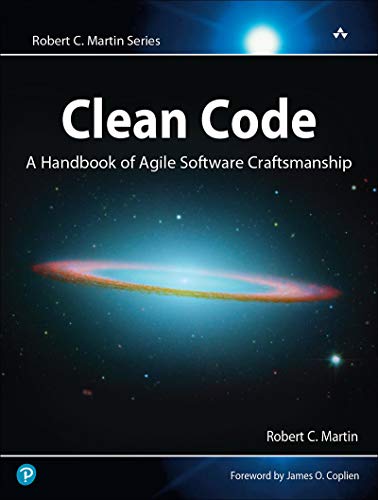
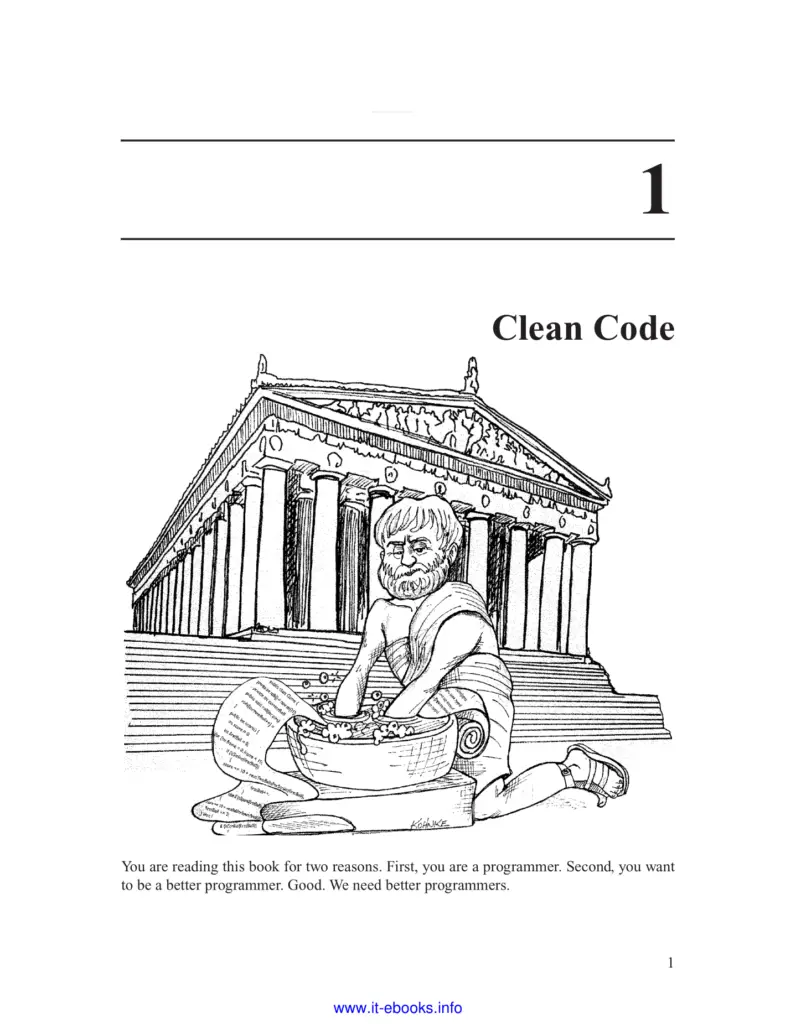
The book which I am using here is “Clean Code by Robert C. Martin”, I am using its first 2 pages of Chapter 1, you can download it from here. Yeah guessed it right, this book teaches you that how you can write clean code and why its matters. If you a programmer you might know the importance of clean code, as one wise man said
Any fool can write code that a computer can understand. Good programmers write code that humans can understand
Martin Fowler
This book is very useful especially if you are a beginner, its Complete focuses on higher-level coding guidelines and the complete software development process. It is critical in the software industry as it is perceived as what makes or breaks a project. Each case study covered in the book is like an exercise of turning a bad code into good code, something which easier to read, understand and maintain. Also, the book is not just about the architecture but also about debugging and performance. If you are interested you can check that book on amazon.com
pdfReader = PyPDF2.PdfFileReader(open('Clean Code.pdf', 'rb'))
for page_num in range(pdfReader.numPages):
    text =  pdfReader.getPage(page_num).extractText()
    engine.save_to_file(text, 'pdf2Aud.mp3')
    engine.runAndWait()
    engine.stop()
    if page_num == 2: # we are just reading two page for now
        break
ipd.Audio('pdf2Aud.mp3')
While listening you can follow the actual pdf text to be sure that it’s going right or not
Clean code chapter 1 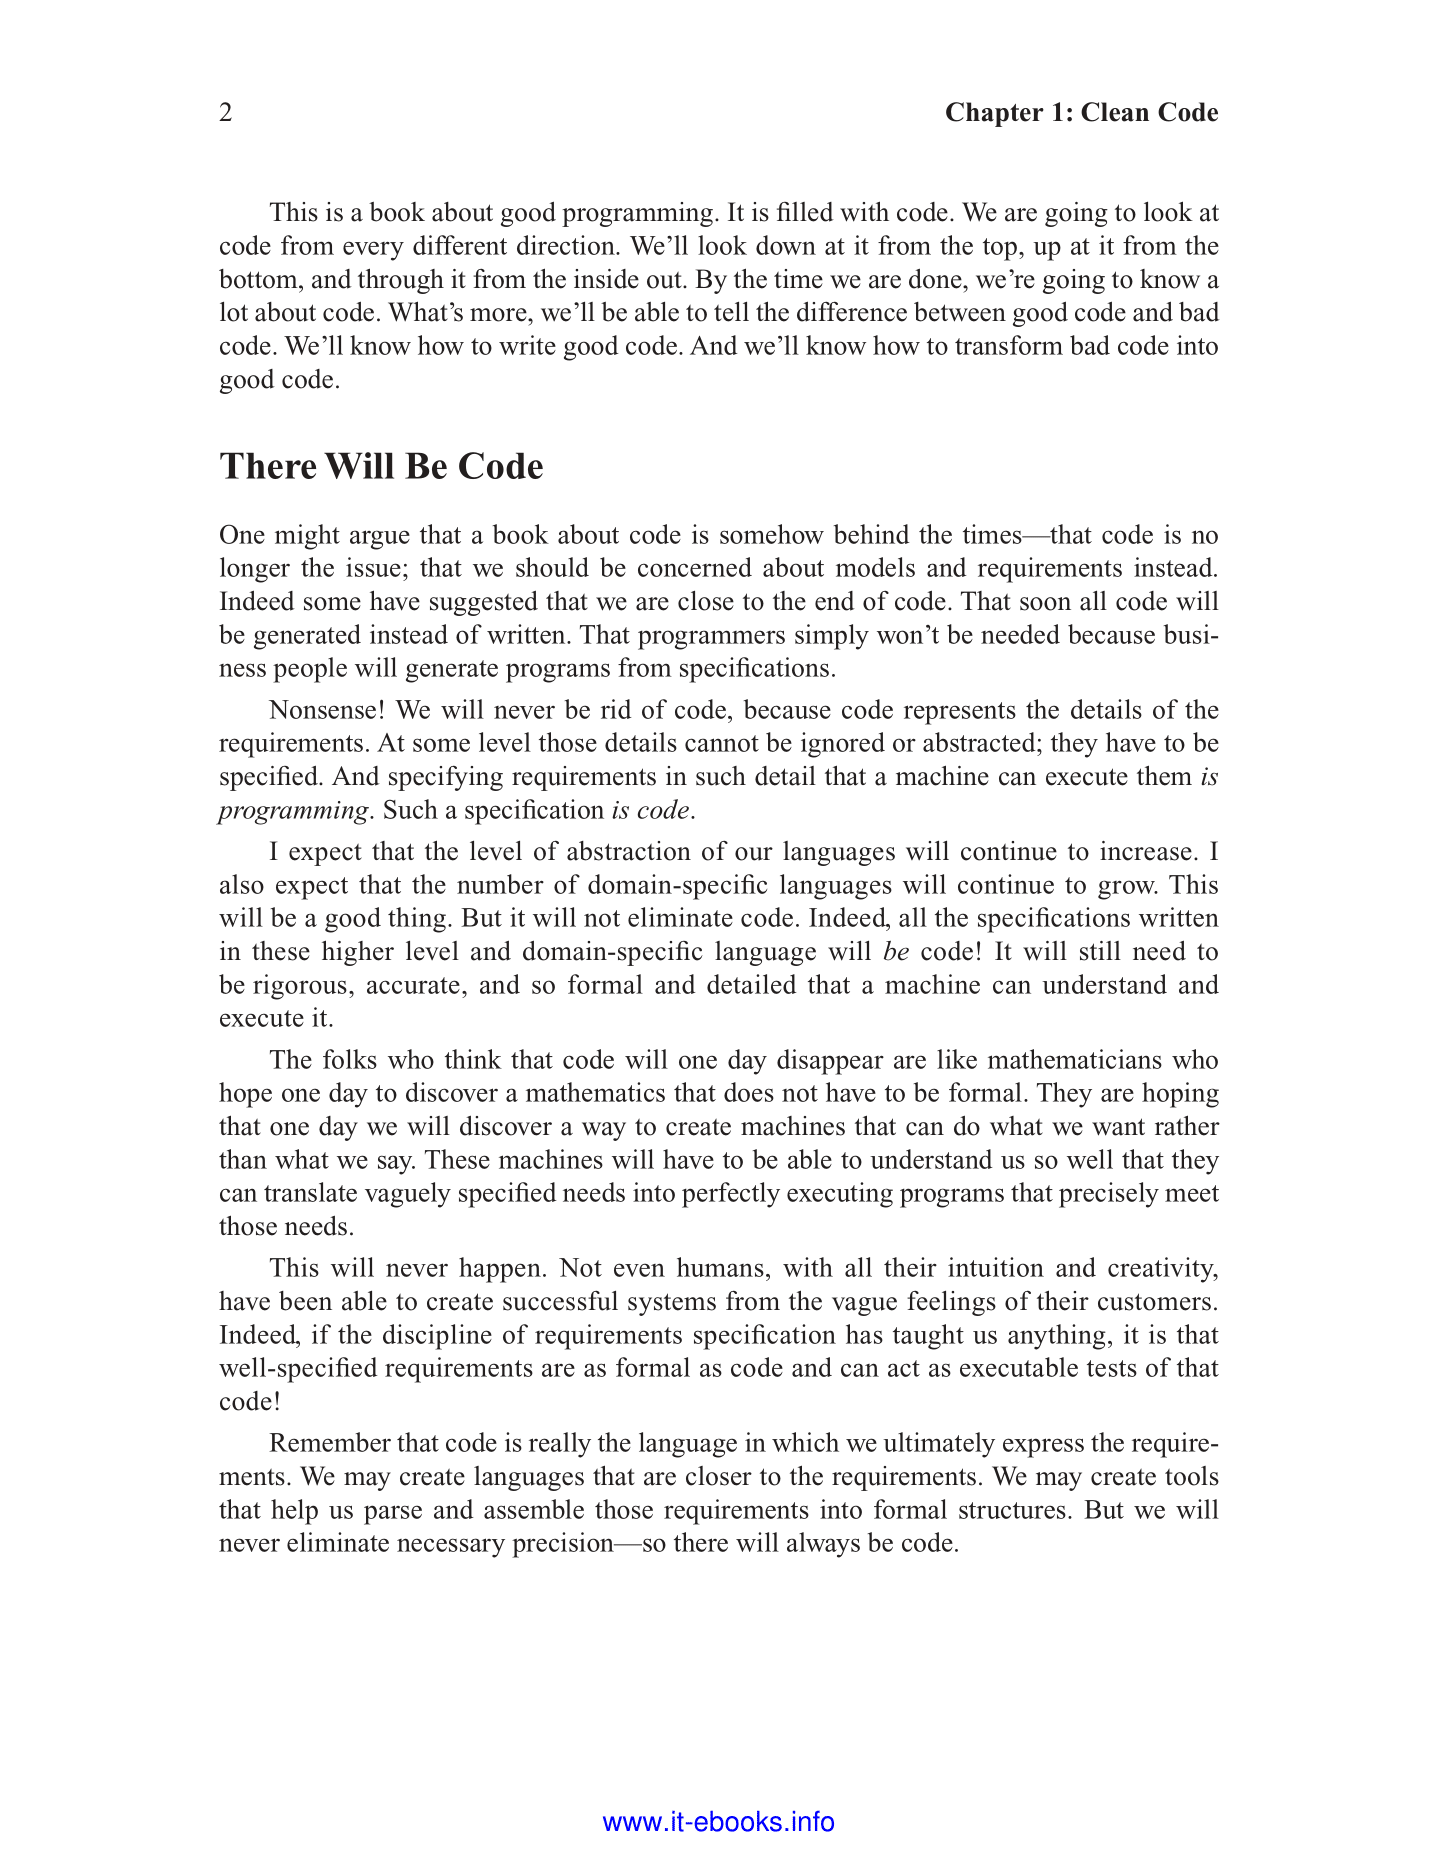
Clean code chapter 1
Okay to make things easy, I created a function where you can just upload your file, file type, and you can choose other voice parameters which we saw earlier and it will create an Audiobook for you.
# function for creating audiobook
def audioBook(file, file_type, volume=1, speech_rate=200, voice=0):

    # intializing pyttsx3
    engine = pyttsx3.init()
    all_voice = engine.getProperty('voices')
    voice_id = all_voice[voice].id # --> voice to be used

    # changing default voice property
    engine.setProperty('voice', voice_id)
    engine.setProperty('rate', speech_rate)
    engine.setProperty('volume', volume)

    # converting pdf file to audio
    if file_type.lower() == 'pdf':
        pdfReader = PyPDF2.PdfFileReader(open(file, 'rb'))
        for page_num in range(pdfReader.numPages):
            text =  pdfReader.getPage(page_num).extractText()
            engine.save_to_file(text, 'Audiobook.mp3')
            engine.runAndWait()
            engine.stop()
            if page_num == 2: # we are just reading two page for now
                break

    # converting text file to audio
    elif file_type.lower() == 'txt':
        with open(file) as f:
            lines = f.readlines()
        engine.save_to_file(lines, 'Audiobook.mp3')
        engine.runAndWait()
        f.close()
    print("file converted successfully and downloaded as 'Audiobook.mp3', pls check you current working directory")

# let's play it
ipd.Audio('Audiobook.mp3')
Another method of creating Audiofile
So, this was all with pyttsx3, now as I promised we will see another method of creating an audiobook, which I think is better than pyttsx3, however cuz of its high quality than pyttsx3 it requires internet and takes a little more time. The library we are going to use is called gTTS.
What is gTTS?
gTTS which stands for google text to speech, and if you guessed that it is from google then you are right. It uses google in the backend to convert any text into audio. With gtts you can create an audio file in any language, with their native voice accent. So, let’s see how we can use it
How to use gTTS?
gTTS is also easy to use the library, in gTTS you can create your audiobook in any language which was not available in pyttsx3. Also, we have another feature called tld which allows us to changes voice accent to our local voice accent, which is one of the interesting features. So, let’s with importing required libraries .
# import packages
# !pip install gTTS
import gtts
from gtts import gTTS
Let’s see the available languages in gtts
# before we start let's see the available languages
gtts.lang.tts_langs()

# output
{'af': 'Afrikaans',
 'ar': 'Arabic',
 'bn': 'Bengali',
 'bs': 'Bosnian',
 'ca': 'Catalan',
 'cs': 'Czech',
 'cy': 'Welsh',
 'da': 'Danish',
 'de': 'German',
 'el': 'Greek',
 'en': 'English',
 'eo': 'Esperanto',
 'es': 'Spanish',
 'et': 'Estonian',
 'fi': 'Finnish',
 'fr': 'French',
 'gu': 'Gujarati',
 'hi': 'Hindi',
 'hr': 'Croatian',
 'hu': 'Hungarian',
 'hy': 'Armenian',
 'id': 'Indonesian',
 'is': 'Icelandic',
 'it': 'Italian',
 'ja': 'Japanese',
 'jw': 'Javanese',
 'km': 'Khmer',
 'kn': 'Kannada',
 'ko': 'Korean',
 'la': 'Latin',
 'lv': 'Latvian',
 'mk': 'Macedonian',
 'ml': 'Malayalam',
 'mr': 'Marathi',
 'my': 'Myanmar (Burmese)',
 'ne': 'Nepali',
 'nl': 'Dutch',
 'no': 'Norwegian',
 'pl': 'Polish',
 'pt': 'Portuguese',
 'ro': 'Romanian',
 'ru': 'Russian',
 'si': 'Sinhala',
 'sk': 'Slovak',
 'sq': 'Albanian',
 'sr': 'Serbian',
 'su': 'Sundanese',
 'sv': 'Swedish',
 'sw': 'Swahili',
 'ta': 'Tamil',
 'te': 'Telugu',
 'th': 'Thai',
 'tl': 'Filipino',
 'tr': 'Turkish',
 'uk': 'Ukrainian',
 'ur': 'Urdu',
 'vi': 'Vietnamese',
 'zh-CN': 'Chinese',
 'zh-TW': 'Chinese (Mandarin/Taiwan)',
 'zh': 'Chinese (Mandarin)'}
And let’s also see available accent in gtts
Actually it changes its accent according to place you are accessing it and for every place google has their different top level domain (eg, .com, .in, .co.in etc)

Okay, let’s see how it works

How to Change voice accent in gtts?

How to create an Audiobook from pdf in gtts?
Again for your ease, I created this function which you can use to create your audio book in any accent and languages.

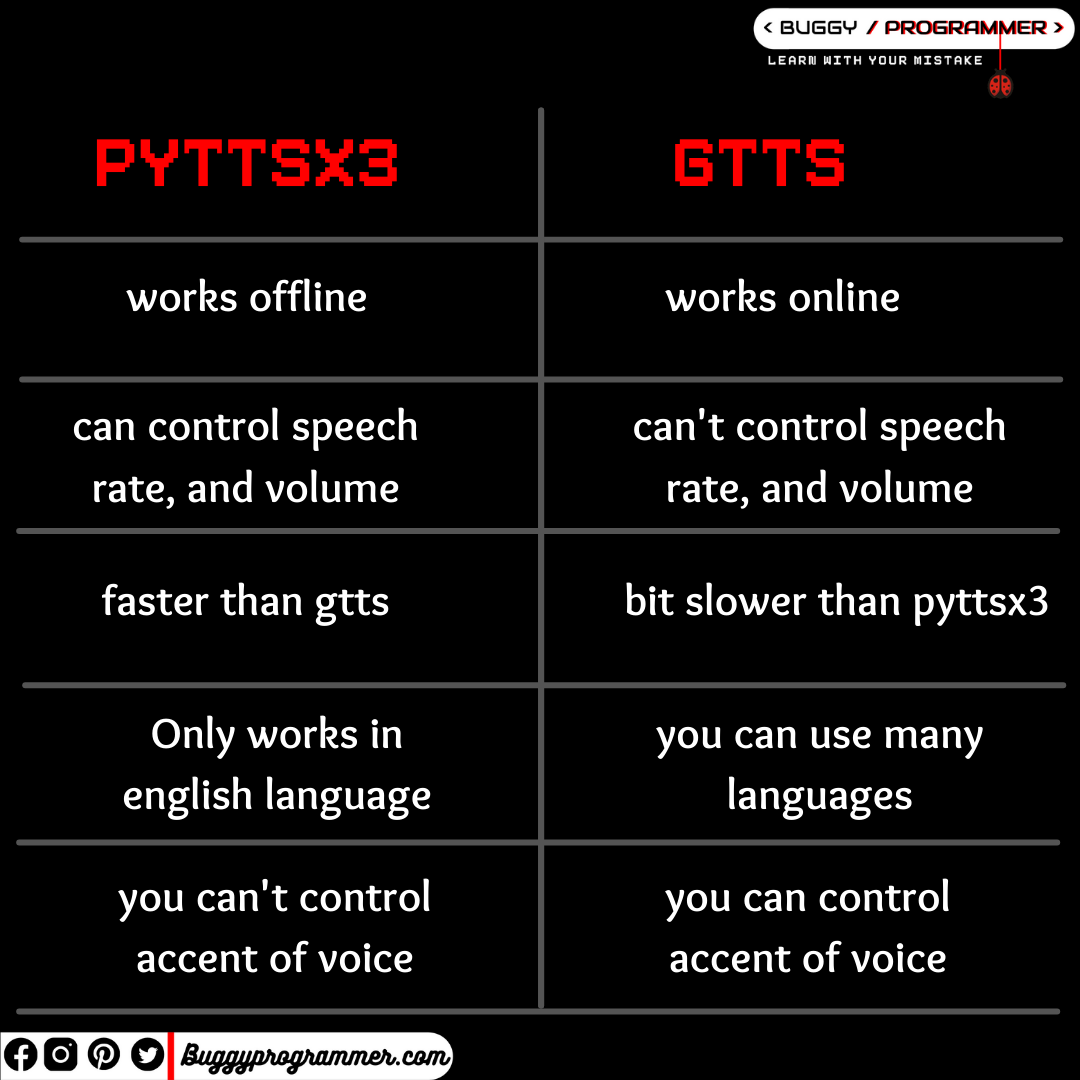
That was all about gtts, so now you may have question that which one should you use, which library is best for you pyttsx3 vs gtts. So, to help you with this lets compare them with their pros and cons.
pyttsx3 vs gtts
Pyttsx3 and gtts are both libraries for tts(text to speech) conversion. Pytssx3 works offline and it doesn’t need internet while gtts uses the internet. In pyttsx3 you can control voice parameters like volume, speech rate, and you can also change the voice (only with the voice available in your system). In gtts you use different voices, accents, and languages.
So, what do you think which is better, comment down below. And Congrats on creating your first audiobook 😀

Data Scientist with 3+ years of experience in building data-intensive applications in diverse industries. Proficient in predictive modeling, computer vision, natural language processing, data visualization etc. Aside from being a data scientist, I am also a blogger and photographer.
- Aman Kumar
- Aman Kumar
- Aman Kumar
- Aman Kumar
- Aman Kumar
- Aman Kumar
- Aman Kumar
- Aman Kumar
- Aman Kumar
- Aman Kumar
- Aman Kumar
- Aman Kumar
- Aman Kumar

